


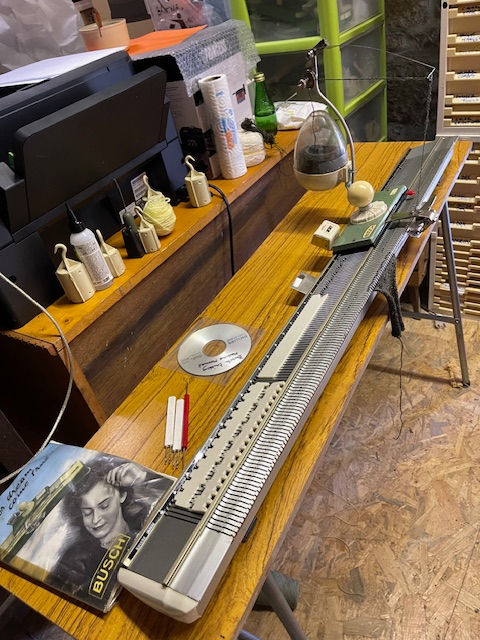


Passap Automatic with ribber


Update on the Passap Automatic Ribber
I had serious problems getting this ribber to work and after struggling for 3 days in the barn, I eventually discovered the problem although it still remains a very difficult ribber to insert the long curved comb. Why a curved comb design, well that is down to the Passap knitting machine which operates with a steel comb that runs the length of the machine (sinker posts in modern machines). This machine knits beautifully and it is a 4 mm model which allows a finer knit. The comb has to curve so that it fits in in front of the steel comb thus providing weight to the stitches. Why is it so difficult to install is down to the seriously small space you have to manipulate to install it, it requires you to try to hold the comb in the centre whilst pushing against the bed of the machine itself which by the way is not fixed then you have to try to insert the wire through the comb – forget it if you have less than best eyesight as its almost invisible. To top that of it almost requires you to insert the wire whilst trying to level the comb with one hand.
I had followed the instructions religiously – turn the ribber handle anti-clockwise to 10 oclock then knit across to form the zig-zag. You then have to hand the dreaded comb by turning the handle again anticlockwise to 7 clock, simple methinks, oh no its not! The instructions then say insert the comb, its almost impossible to do, but I persevered managing only once out of say 2 dozen attempts, then I knit across, and it immediately drops all the stitches on the ribber side. Talk about thinking about throwing the machine out of the window…
After hours of thinking this is a useless bit of kit, I wonder how I managed to do it on receiving the machine as new – it was I thought so easy, so what went wrong in the interim. I had bought a second new boxed ribber that perhaps the owner had attempted to cast on as the needles had been removed as is required if you do not need the whole bed. Obviously they had no joy either. The 2nd ribber bed was so stiff to operate and the handle did not click when reaching the number suggested for the stitch so no joy there, however the saving grace was that I had a brand new comb and wire and thus this is what perhaps helped me eventually.
I know I must get down to opening up the second ribber as it needs a careful clean and oil and I will do this, and it will serve as a spare. I only cost me 30 euros so it was a lucky but rare find and well worth trying to restore.
The comb itself is extremely fragile and anyone who has a normal ribber comb will know that if the wire is out of shape or the comb itself has been dropped just how difficult it is to thread the wire through, well in this case as it’s a curved comb and its so long plus the space to use it is so limited it makes this exercise so difficult I almost gave up.
So a fresh start a couple of days later, I decided to take a long look at what could possibly go so wrong. The first job with this ribber is to install it, again once you have an idea of how, it’s a simple exercise. You must ensure it is in the right place and as the cast on is as the ribber is set for a one by one rib, then the needles must be centralised and this is done simply by ensuring the slide is in the correct position before you click the locks on either side of the ribber then you screw in the bolt to secure it into place. This is well explained in the instruction manual. Once it is secure you click the handle into its slot and test it is working by turning anticlockwise to the places that you hear or feel the click, in the case of my ribber, this is at 12 oclock, 9 oclock and 7 oclock. The main stop according to the manual is at 10 oclock which does not have a click so is therefore difficult to place. My conclusion is that this instruction should be 9 oclock not 10 oclock as this places the needles to high and therefore the stitch is below the hook and accordingly when you turn the handle the stitch is dropped off the bed.
Now I try again, I cast on and use the 9 oclock setting ensuring the stitch lies in the hooks and not below the latches, I then turn the handle anticlockwise to setting 7 and this pulls the stitches tighter so the comb is easier to install - then I install the comb, still not an easy task but somehow I managed it, the comb hung and I knit to the left, then to the right – the next row you are instructed to turn the comb to setting 10 but I ignore this and turn it to 9, and this knits off the rib row – this is how it goes from now on.
I have just watched a youtube video re the Passap 201 with this ribber however the most important part was missing and that is the insertion of the wire into the comb. She also did not insert the wooden pieces that are used to hold the knitting down which to me is an easy exercise and takes only a few moments. That apart it was fine.


Comments