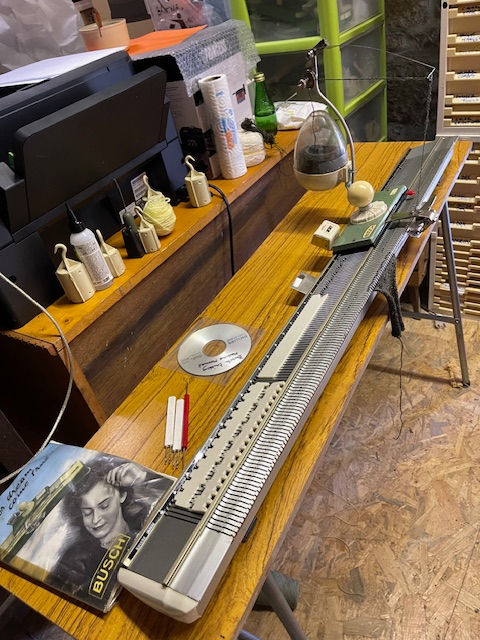
Passap Automatic with ribber update
- Maggi Bloice

- Sep 20, 2023
- 3 min read
Updated: Dec 21, 2023
Update on the Passap Automatic and Ribber
I bought this machine many moons ago - I could not resist as it was brand new and inside a rather sorry looking box but it was still in its original packing. The Passap Automatic Knitting Machine is in glorious gold enamel with steel bed and 201 needles (as per the predecessor the Passap 201).
Enclosed in the box was the rare Passap 201 Ribber again in a gold enamel. The machine although I have had it for a number of years has not been looked at since around 2016 so it needed a clean and oil and a run so I could remember how to operate it. Must confess it is such a wonderful knitting machine to operate and so easy when you know how. This is one vintage machine if bought in good condition that really does produce.
Basic Patterning System
Although the patterning is a bit basic but that is nothing new with respect to vintage machines, it does tuck and fairisle and the book outlines a good few stitch types. After cleaning and oiling, I cast on using an ewrap and set the lock and off it went despite not being used for years. The instruction manuals are very clear and concise so it was easy to get started, (or is it that I have got more experienced over the years) who knows. The thing that interested me was that a student contacted me a few years back, she was looking for an Passap automatic because of its gauge, and that surprised me as I always assumed it was a 5 mm gauge however as she had said, it is indeed a 4 mm gauge - it knits as per hand knitting, I tested it with a very fine yarn and a more substantial 4 ply and it was no bother. The lock is so easy to operate.
Original Packaging
Now to come to the ribber, this is a very unusual bit of kit, it comes with 2 wooden rods and some elastic tensioning straps, plus a fairly hefty cast on comb. The first time I set this up was difficult but this time absolutely no bother, I simply slid the ribber onto the brackets, ensured it was set properly and tightened a bolt and that was it. Now to another unusual feature and that is the needles, they are removable with a special tool provided and you simply set them up as to the rib you want, it even does fisherman’s rib. Top operate the ribber, you have to turn a handle to an oclock setting anticlockwise and this is how it knits off the stitches, so no special ribber carriage required - all one has to do is to remove the latch opening plate from the main lock by unscrewing - tales no time at all.
Casting on with the Ribber

You cast on from the right as per most ribbers after you open the needle latches on both side, you set the handle to a 10 oclock setting and you set the needles in my case in a one by one setting. You run the lock from left to right and you have a v formation of the stitches, you then turn the ribber handle to a 7 oclock setting - this elongates the stitches then you insert the comb and wire after which you knit to the left and again to the right - after this you set the elastic straps to give tension on the knitting, turn the handle to 10 oclock and knit to the left and set the row counter, from there on you simply knit and its oh so smooth. Now my machine was new so the needles were in good condition and I suspect these needles will not be easy to obtain, so ensure if you are lucky enough to own one, that the needles are well looked after. After knitting about 20 rows, I transferred the stitches again using the 7 oclock setting using a double ended bodkin, must admit this was the most fiddly bit of the whole process but once done it is relatively easy to knit on.
This Ribber fits the Passap 201
This ribber fits the Passap 201 as I have the required setting plates for it. This means that the Passap 201 is a 4 mm gauge as well, well I never. The one thing about the Passap 201 and I have a few is that the locks are very fragile, I have a couple with broken cams as they were so flimsy and when this happens they are useless I guess.


Hi, have just bought an M-201 as a starter machine and had been looking for some information about the ribber attachment - hopefully something to pick up down the line.
Glad to have someone like yourself sharing the good, the bad, and the ugly for the rest of us.
You mentioned about the cams on the locks being fragile and useless if shot. As a complete novice, can I ask, where are these located?
It'd be handy to know what to check if viewing a potential donor machine.