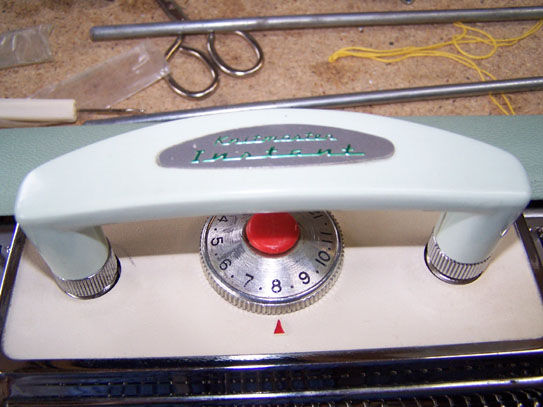
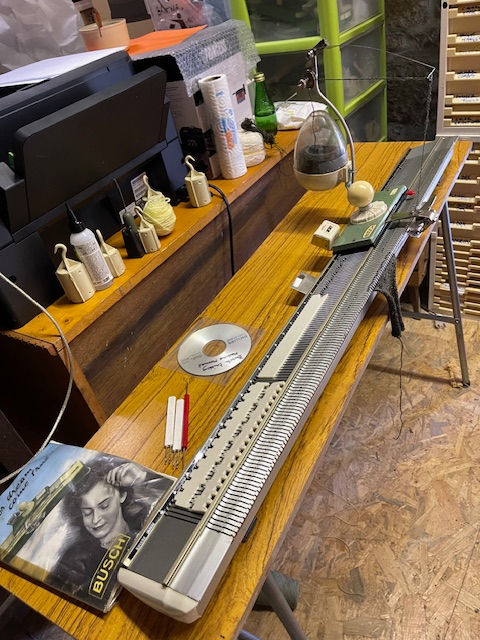
Knitmaster Instants
- Maggi Bloice

- Jul 23, 2017
- 4 min read
Casting on and working with the Knitmaster Instants

The manual for the Knitmaster Instant Knitter that I have ie the one with the handle is available on my favourite site.
http://machineknittingetc.com/
By the way there are 2 books for the instant knitter - as far as I can see but once you open the downloaded PDF’s you will soon see the relevant one – mine is a simple lay the yarn across type and there is a hook that pulls out the needle retainer bar so that you can put out of position the 6 needles either side of your knitting then you simply replace the bar. You should have a cast-on rag for this machine, I am lucky enough to have several made by a dear friend of mine a good few years ago.

Casting On
You simply slip the cast on rag behind the latches then use a cast on cord and in my case I pulled the cast on rag over the cord and I was ready to go. I used a difficult yarn on tension 10 and I have to admit it knits easily – the sinkers which are moveable push the knitting over the latches and then pushed the knitting back with my hand and do the same again. There is plenty of info in the instruction manual so take time to read it.
This is a tiny machine compared to today’s models, you can see pictures of my two machines in the museum. They came in cardboard boxes with red ties – I believe they were distributed in the 1960’ though info is thin on the ground.
This included a plastic tube (for joining together the long bar weight) a single tool with a hook on one end and a latch on the other, a small metal clip and a holder for a row counter, not included. Some of the other tools were missing but you know me I have a tone of odds and sods stuff so I was able to improvise.
Knitmaster Instant - retainer hook

You have to use a hook to pull out the needle retainer, then push about 6 needles either side of the number of needles you wish to use. You then push back the retainer, by the way there is one bar for each side of the needlebed.
Push the cast on rag on i.e. one hole per needle and then comes the important bit, you must push the rag behind the latches and then ensure the latches are open by using the supplied brush or similar type of tool. You then lay the yarn from right to left across the needle hooks, allowing a little tensioning (I use the yarn from the floor) in this instance 4 ply acrylic – nice and easy to knit with a tension of 7. You must check that the yarn is laid in the needle hooks then take the carriage across – the weight of the pole holds the knitting down and then the springs push the stitches off and you have your first row. Every row you must push the knitting back behind the latches before laying the yarn across and knitting your second row – the machine knits a soft hand knit finish. No doubt you will, like me, drop the stitches as many times till you get used to the correct feel and procedure. This machine is not easy to use, and if you want fancy stitches, get another model. It does allow ease for knitting intarsia or stripes or in fact anything to do with the yarn, but as the needles are fixed, fancy stitches are difficult if not impossible. Note there is no holding position.
The above method allows for an open cast on, however, if you get a bit of fine smooth cast on cord and knit to the right, then loosely e-wrap your main yarn from left to right on top of these stitches and then bring the yarn back again across the needles (carriage is on the right) make sure that the work is behind the latches, knit to the left, you will perhaps attain a closed edge cast on. Other ideas are to perhaps knit your ribs by hand and do a first knit row. Then hang onto the machine and off you go.

Cast On Rags
If this was my main machine, I would knit a few cast on rags of different sizes as they are easier than the red flannel as this starts to wear after a few times use (not surprising given its age). If you do use cast on knitting, make sure it is evenly weighted across the bed. This machine clamps to the table.
If you are curious, and want to look at the needle size by turning the bed over, be careful, I landed up with all the needles sitting in my lap and a couple of hours hassle putting it together again. The needles are tiny compared to most and spares will be non- existent. As for patterns, well any plain hand knit pattern will suffice as long as you get the tension correct – this machine is a 5mm gauge – same as the Passap and Superba. It has 12 stitch tensions and I imagine it would knit double knitting reasonably well, if it does not like what you are doing, you will soon know, the carriage refuses to move. As is normal with these vintage machines, the more you use them the better and easier they knit, providing they are well oiled and clean without rusty needles. The maximum needles would be 166 if they are all there.
I like this model but only as a collection piece, despite researching my old books and adverts as far back as the 60’s I just cannot find any ads for this baby. Perhaps I will have to take a look at my very old Knitmaster pattern books to see if they considered this model. However, that’s for another day.


This is a big help. I’ve been gifted an Instant. I have a problem that the Retainer Bar won’t pull out with the draw hook. In fact on left side the part you pull is mostly inthe machine. Has someone dropped it maybe? I’d be grateful for any help
I love this machine, as you said it gives a hand knit feel to your garments and once you get into a rhythm it’s a gem to knit with and because the work is on fixed needles and also not pulled down with many heavy weights any dropped stitches don’t rip down easily and your work doesn’t end up on the floor and on you toes! You can easily rip back as on other machines and you can do short rows too. The tension dial doesn’t feel robust though and feels like it doesn’t do much but it is pushing out the sinkers to create the tension, so T2 pushes the knitting off with a slight gap whilst T12 pushes…